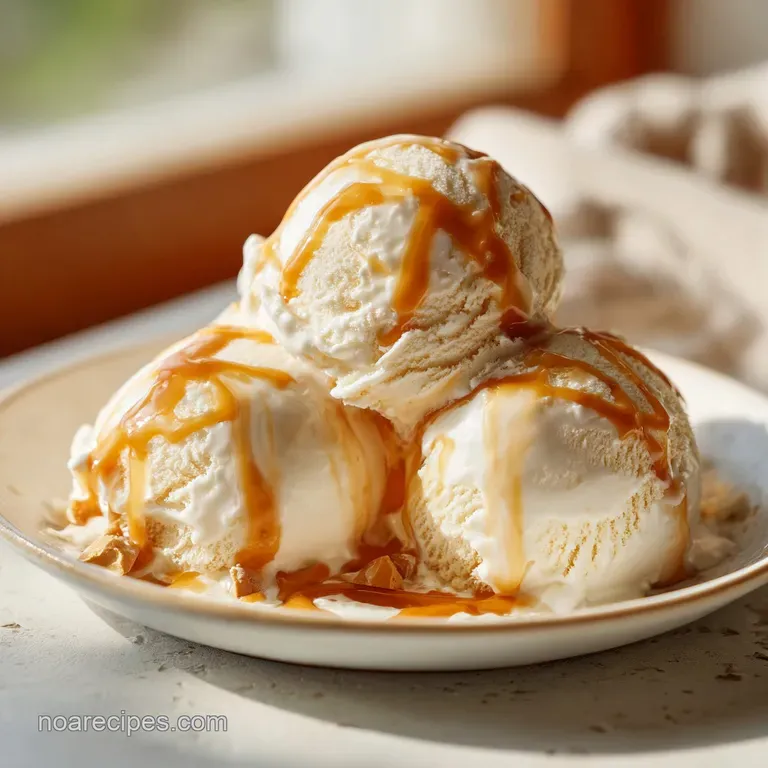
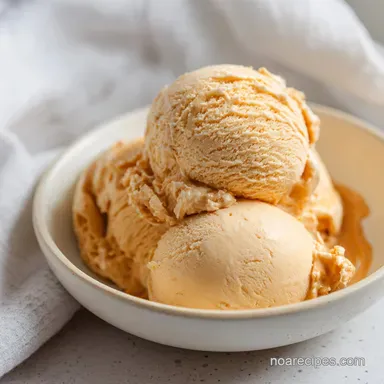
Butterscotch Toffee Ice Cream: Ultra-Creamy and Rich
- Time:15 minutes prep + 10 minutes cook + 6 hours chilling = 385 minutes total
- Flavor/Texture Hook: Silky butterscotch base with shattering shards of salty toffee
- Perfect for: Stress free hosting, weekend projects, or anyone who loves a deep, burnt sugar profile
- How to Make Perfect Butterscotch Toffee Ice Cream
- Why This Recipe Works Well
- Essential Ingredient Shopping List Breakdown
- Minimal Tool Requirements
- From Kitchen Prep to Plate
- Avoiding Common Cooking Mistakes
- Flavor and Texture Variations
- Scaling the Recipe
- Long Term Storage Guidelines
- Serving and Presentation Ideas
- Recipe FAQs
- 📝 Recipe Card
How to Make Perfect Butterscotch Toffee Ice Cream
There is a specific moment when you’re melting butter and sugar together where the air in the kitchen just changes. It starts as a sweet, light scent, but then it deepens into something toasted and almost savory. That’s the smell of this recipe beginning.
Discover the ultimate recipe for rich Butterscotch Ice Cream with delightful Crunchy Toffee Pieces. I remember the first time I realized I didn’t need to stand over a stove tempering egg yolks for an hour just to get a velvety scoop. It felt like a total win.
This version is all about the contrast between the smooth, cold dairy and those jagged, glass like bits of toffee that crack when you bite into them. We aren't using those soft, store-bought chips that turn into pebbles in the freezer.
We’re making the real deal on your stovetop, and trust me, the sound of that toffee shattering under a rolling pin is one of the most satisfying things you’ll hear all week.
We are going for a deep, dark butterscotch flavor here. By using dark brown sugar instead of light, we get those intense molasses notes that make the ice cream taste like it came from a high end scoop shop.
It’s simple, it’s honest, and it’s going to be the thing your friends ask for every time they come over. Let's get into how we make this happen without overcomplicating the process.
Why This Recipe Works Well
- Hard Crack Precision: Heating the butter and sugar to 150°C ensures the toffee actually snaps instead of staying chewy or sticky in the freezer.
- Cold Whisk Stability: By dissolving the brown sugar directly into cold milk, we avoid thinning out the base with heat, leading to a much creamier churn.
- Fat Balance: Using a 2:1 ratio of heavy cream to whole milk provides enough fat to coat the tongue without feeling greasy or heavy.
- Molasses Depth: Dark brown sugar carries a higher moisture and acid content than white sugar, which keeps the frozen base softer and easier to scoop.
| Method | Prep Time | Texture Result | Best For |
|---|---|---|---|
| Stovetop Toffee | 10 mins | Sharp, shattering snap | Authentic flavor and crunch |
| Oven Toffee | 15 mins | Graham cracker like | Softer bite, less intense |
| store-bought Bits | 0 mins | Soft and chewy | Saving time on busy days |
While store-bought bits are an option, they often contain oils that change the mouthfeel of the ice cream. Making it on the stovetop allows the butter flavor to really shine through, which is the whole point of a butterscotch profile.
Essential Ingredient Shopping List Breakdown
To get that classic "butter brickle" style, the ingredients need to be high-quality because there are so few of them. We aren't hiding behind artificial flavorings here.
| Component | Science Role | Pro Secret |
|---|---|---|
| Dark Brown Sugar | Flavor and texture | Pack it firmly to ensure you get the full molasses hit. |
| Heavy Cream | Air entrapment | Keep it in the back of the fridge so it stays as cold as possible. |
| Vanilla Bean Paste | Aromatic depth | Use paste over extract to see those beautiful black specks. |
- 0.5 cup salted butter: This provides the fat and the salt for the toffee. Why this? Salted butter adds a depth that unsalted just can't match in candy.
- 0.5 cup granulated sugar: For the toffee base. Why this? It caramelizes more predictably than brown sugar for the hard crack stage.
- 0.25 tsp sea salt: For the toffee.
- 1 cup packed dark brown sugar: The heart of the ice cream base.
- 2 cups heavy cream: This is where our velvety texture comes from.
- 1 cup whole milk: Thins the cream just enough to keep it from turning into butter during churning.
- 1 tbsp vanilla bean paste: For that floral, rich aroma.
- 0.5 tsp fine sea salt: To balance the sweetness of the base.
Minimal Tool Requirements
You don't need a professional pastry kitchen to pull this off. A heavy bottomed saucepan is your best friend here because thin pans have "hot spots" that will burn your sugar before it ever reaches the right temperature.
If you don't have a silicone mat for the toffee, parchment paper works perfectly well, though you might need to peel it off carefully once the toffee is cold.
An ice cream maker is essential for that specific aerated texture. If you're using a canister style maker (the kind where you freeze the bowl), make sure that bowl has been in the freezer for at least 24 hours.
I’ve made the mistake of trying to churn after only 12 hours, and all I got was sweet soup. Also, an instant read thermometer is a non negotiable for the toffee. Guessing the temperature is how you end up with toffee that sticks to your teeth forever.
From Kitchen Prep to Plate

Creating the Toffee Shards
- In a heavy bottomed saucepan, melt the 0.5 cup salted butter and 0.5 cup granulated sugar over medium heat. Note: Use a wooden spoon or silicone spatula as metal can get too hot.
- Stir constantly until the mixture reaches the hard crack stage at 150°C on an instant read thermometer.
- Immediately pour the molten toffee onto a silicone baking mat, spreading it into a thin layer. Note: Work fast, as it begins to set the moment it hits the air.
- Allow to cool and harden completely, then shatter into small pieces using a rolling pin.
The Cold Whisk Base
- In a large mixing bowl, whisk together the 1 cup dark brown sugar, 1 cup whole milk, and 0.5 tsp fine sea salt.
- Continue whisking until the sugar is completely dissolved and you no longer hear that "sandy" sound against the bowl.
- Stir in the 2 cups cold heavy cream and 1 tbsp vanilla bean paste until well combined.
The Churn and Fold
- Pour the mixture into your ice cream maker and churn until it reaches a soft serve consistency, usually about 20 minutes.
- Gently fold in the prepared toffee shards using a spatula.
- Transfer to a chilled container and freeze for at least 6 hours until the center is firm.
Avoiding Common Cooking Mistakes
Hard Crack Toffee Texture
The biggest heartbreak in candy making is "sugar separation." This happens when the butter and sugar decide they don't want to be friends anymore, and you end up with a puddle of oil on top of a grainy brown mess. This usually happens if the heat is too high or if you stop stirring.
If you see oil separating, add a teaspoon of hot water and whisk like your life depends on it. It usually brings the mixture back together.
Preventing Icy Textures
Ice crystals are the enemy of a joyful scoop. They happen when the mixture freezes too slowly or if there isn't enough sugar dissolved. That is why we whisk the brown sugar into the milk first. If those grains don't dissolve, they act as "seeds" for ice crystals to grow around.
Take the extra two minutes to whisk until that grittiness is totally gone.
| Problem | Root Cause | Solution |
|---|---|---|
| Soft Toffee | Temperature too low | Must reach 150°C exactly before removing from heat. |
| Grainy Ice Cream | Undissolved sugar | Whisk sugar and milk longer before adding cream. |
| Butter Bits | Over churning | Stop as soon as it looks like soft serve. |
Common Mistakes Checklist
- ✓ Use a thermometer for the toffee; "color guessing" is unreliable for beginners.
- ✓ Pat the toffee dry if any butter beads on the surface before folding it in.
- ✓ Pre chill your storage container in the freezer while the machine is churning.
- ✓ Never add warm toffee to the ice cream; it must be completely cold.
- ✓ Store the finished ice cream in the back of the freezer, not the door.
Flavor and Texture Variations
If you want to put a spin on this, the base is incredibly forgiving. I’ve found that a splash of dark rum or bourbon (about one tablespoon) added with the vanilla can prevent the ice cream from freezing rock hard. Alcohol doesn't freeze, so it keeps the scoop a bit more supple.
Just don't overdo it, or you'll have a milkshake that never firms up.
For a "Salted Bourbon" variation, swap the vanilla paste for a tablespoon of high-quality bourbon and increase the sea salt in the base to 0.75 tsp. The salt cuts through the heat of the alcohol beautifully.
If you're a fan of a "Coffee Butterscotch" profile, dissolve a teaspoon of espresso powder into the milk along with the brown sugar. It adds a sophisticated bitterness that balances the sugary toffee perfectly.
Scaling the Recipe
Making a Small Batch
If you want to cut this in half, it works perfectly. Use 0.25 cup butter for the toffee and 1 cup of heavy cream for the base. You might find the toffee cooks a bit faster in a smaller pan, so keep a very close eye on that thermometer.
The churning time will likely drop by about 5 minutes because there is less volume to chill.
Doubling for a Crowd
When doubling, I recommend making the toffee in two separate batches. Dealing with a massive amount of 150°C molten sugar can be dangerous and hard to spread thinly enough. For the base, you can mix it all at once, but ensure your ice cream maker has the capacity.
Most home machines max out at 1.5 to 2 liters. If yours is smaller, churn the base in two rounds to keep it fluffy.
Long Term Storage Guidelines
Storage: This ice cream will stay fresh and delicious in the freezer for up to 2 weeks. After that, you might start to see some ice crystals forming on the surface. To prevent this, press a piece of plastic wrap or wax paper directly onto the surface of the ice cream before putting the lid on.
This blocks out the air that causes freezer burn.
Zero Waste: If you have leftover toffee shards that didn't make it into the batch, don't toss them! They are incredible stirred into your morning yogurt, sprinkled over a bowl of oatmeal, or even crushed and used as a rim for a festive cocktail.
You can also melt them down with a little extra cream to make a quick butterscotch sauce for later.
Serving and Presentation Ideas
When you're ready to serve, don't just dig in straight from the freezer. Give the container about 5 to 10 minutes on the counter to soften slightly. This isn't just about making it easier to scoop; it actually allows the flavors to wake up.
Frozen fats don't carry flavor as well as slightly softened ones, so a bit of patience goes a long way.
For a beautiful presentation, use a warm scoop (dip it in hot water and wipe dry) to get those perfect, round globes. Top each serving with a few extra shards of toffee that you’ve set aside. If you want to go all out, a tiny pinch of flaky sea salt on top of the scoop makes the butterscotch notes sing.
It’s simple, elegant, and shows off the homemade nature of the dish without needing fancy garnishes.

Recipe FAQs
What are the crunchy bits in Butterscotch Toffee Ice Cream?
They are homemade toffee shards. These pieces are created by cooking salted butter and granulated sugar to 300°F, allowing them to harden, and then shattering them into small fragments.
What is the difference between butterscotch and toffee bits?
Butterscotch typically refers to the flavor profile, while toffee bits are a specific confection. In this recipe, the toffee shards provide the signature crunch, while the base flavor of the ice cream itself mimics the rich, buttery sweetness of butterscotch.
Is there a toffee ice cream?
Yes, this recipe is specifically designed as a toffee crunch ice cream. It features a smooth base made from dark brown sugar and heavy cream with added shards of hard cracked toffee.
How to ensure the toffee pieces stay crunchy in the ice cream?
Cool the toffee completely and pat it dry before folding it into the mixture. Adding warm toffee to your churning base will cause the pieces to melt and lose their texture.
Is it true I can use a visual color test instead of a thermometer for the toffee?
No, this is a common misconception. Relying on visual color cues is unreliable; you must use an instant read thermometer to reach exactly 300°F to ensure the toffee sets properly.
How to store the finished ice cream to maintain the best quality?
Place the container in the back of the freezer, not the door. The back of the freezer maintains a more consistent temperature, which prevents the ice cream from softening and refreezing.
How to avoid a gritty texture in the ice cream base?
Whisk the dark brown sugar, whole milk, and fine sea salt until no grit remains. Ensuring the sugar is completely dissolved before you add the cold heavy cream is key to a smooth, premium finish.
Butterscotch Toffee Ice Cream
Ingredients:
Instructions:
Nutrition Facts:
| Calories | 312 kcal |
|---|---|
| Protein | 1.2 g |
| Fat | 23.1 g |
| Carbs | 26.8 g |
| Fiber | 0 g |
| Sugar | 26.2 g |
| Sodium | 218 mg |
