Chocolate Mug Cake: Fudgy and Rich
- Fulfilling Cravings With Quick Microwave Mug Cake For One
- Secrets To Achieving Fudgy Texture
- Quick Decision Comparison Table
- Component Analysis For Best Texture
- Choosing Components For Rich Flavor
- Must Have Tools For Success
- Precise Steps To Chocolate Bliss
- Fixing Common Microwave Baking Issues
- Creative Variations For Your Mug
- Storing And Reheating Your Treat
- Perfect Sides For Your Cake
- Recipe FAQs
- 📝 Recipe Card
Fulfilling Cravings With Quick Microwave Mug Cake For One
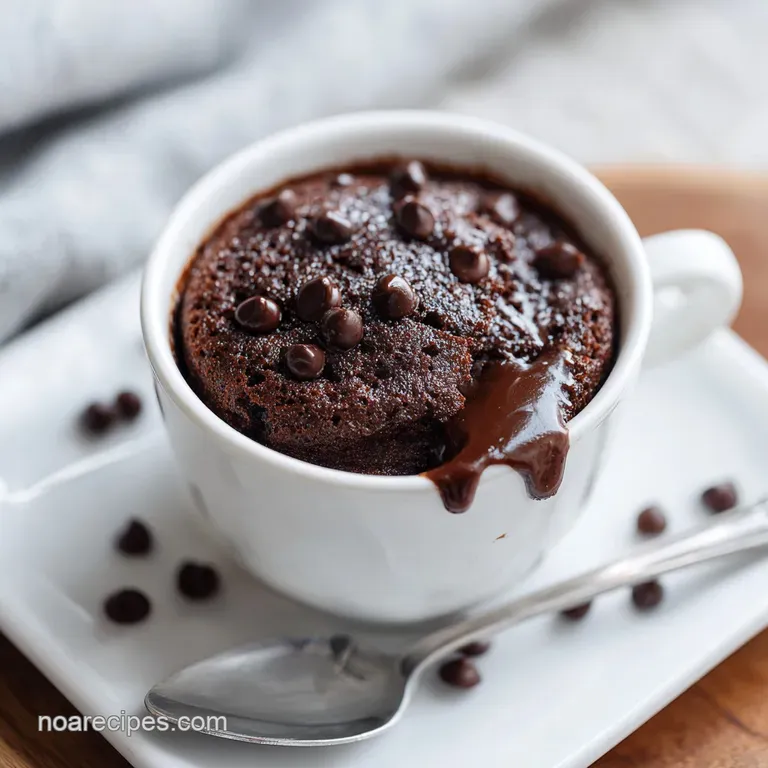
The soft beep of the microwave timer is usually a sound for leftovers, but tonight, it's the signal that a velvety, molten centered treasure is ready. I remember the first time I tried making a quick microwave mug cake for one.
It was 11:00 PM on a Tuesday, and my pantry was looking pretty bare, but my chocolate craving was screaming. I wanted something warm, something homemade, and I wanted it before the next episode of my show started. I grabbed a chipped ceramic mug, whisked some flour and cocoa together, and hoped for the best.
What came out wasn't just a snack; it was a revelation of steam and sweetness. It wasn't the rubbery, sad sponge I had seen in so many "failed" internet videos. It was moist, rich, and had that perfect tacky center that reminds you of a brownie pulled from the oven just a minute early.
That single mug changed how I viewed solo treats. It’s about the joy of a scratch made dessert without the burden of a dozen cupcakes sitting on the counter for a week.
We have all been there, standing in the kitchen, wanting just one bite of something sweet. This recipe is for those exact moments. It is foolproof, fast, and designed to satisfy that deep seated need for chocolate without the fuss of preheating an entire oven.
We are going to walk through how to keep it from getting tough, how to ensure there are no flour clumps at the bottom, and why that two minute rest is the hardest but most important part of the whole process. Trust me, your future late night self will thank you for learning these tricks.
Secrets To Achieving Fudgy Texture
The most common complaint I hear about this quick microwave mug cake for one is that it can turn out like a bouncy ball. We want cake, not a trampoline! The reason this happens is usually related to how the microwave interacts with the proteins in the flour and the moisture in the milk.
Unlike an oven, which uses hot air to cook from the outside in, a microwave vibrates water molecules to create heat. This means things happen fast sometimes too fast.
Steam Expansion: The baking powder reacts almost instantly under high heat, creating tiny air pockets that expand rapidly. This is why you see the cake rise like a volcano over the rim of the mug before it settles back down.
Residual Heat: When the microwave stops, the cake is still technically cooking. If you wait until it looks completely dry on top, you have already overcooked it. Stopping while the center is slightly tacky ensures it stays velvety instead of becoming dry and crumbly.
Fat Content: The oil and whole milk are non negotiable here. They coat the flour particles, which limits gluten development. Less gluten means a tender crumb that yields to your spoon rather than fighting back.
Heat Distribution: Since microwaves have hot spots, using a round ceramic mug helps the waves bounce more evenly. Avoid square containers, which can lead to overcooked, hard corners that are impossible to scrub off later.
Quick Decision Comparison Table
Before you decide to commit to the microwave, it’s helpful to see how it stacks up against the traditional oven method. While I love my oven for a big batch of chewy chocolate chip cookies, the microwave is the undisputed king of the single serve world.
| Method | Total Time | Texture | Best For |
|---|---|---|---|
| Microwave | 6 minutes | Molten, soft, steamy | Instant cravings, late night |
| Conventional Oven | 25 minutes | Crispy edges, airy crumb | Sharing, structured layers |
| Toaster Oven | 18 minutes | Balanced, slightly dry | Small dorm rooms, no microwave |
There is a distinct difference in the "mouthfeel" of these methods. The oven creates a crust that beautiful, slightly crunchy top that we all love. The microwave focuses purely on the interior, giving you a texture that is closer to a steamed pudding or a warm fudge cake.
If you are looking for that "shatter" of a crisp top, you won't find it in a mug, but you will find a richness that is hard to beat for a 1 minute cook time.
Component Analysis For Best Texture
Understanding what each part of your quick microwave mug cake for one actually does helps you troubleshoot on the fly. It's not just about mixing things in a cup; it's about a specific harmony of ingredients.
| Ingredient | Science Role | Pro Secret |
|---|---|---|
| All Purpose Flour | Structural Base | Spoon and level it; never pack it down into the cup. |
| Unsweetened Cocoa | Flavor & Acidity | Sift it with a fork first to prevent bitter lumps. |
| Baking Powder | Leavening Agent | Check the date! Old powder means a flat, heavy cake. |
| Whole Milk | Hydration & Fat | Use room temp milk so the oil doesn't clump up. |
While some might suggest using water, I find that whole milk provides a much needed fat boost that mimics the richness of a traditional butter cake. The proteins in the milk also help stabilize those tiny air bubbles created by the baking powder.
This results in a cake that doesn't collapse the second you take it out of the heat.
Choosing Components For Rich Flavor
When we talk about making a quick single serve dessert, the quality of your ingredients matters more because there are so few of them. Every gram of cocoa and every drop of vanilla has to pull its weight.
- 1/4 cup all purpose flour: This is the skeleton of your cake. Why this? Provides enough protein for structure without being as heavy as bread flour.
- 2 tbsp unsweetened cocoa powder: Go for a high-quality Dutch processed cocoa if you can. Why this? It has a smoother, deeper chocolate flavor and reacts well with baking powder.
- 2 tbsp granulated sugar: Just enough to balance the cocoa's bitterness. Why this? Sugar also helps keep the cake moist by holding onto water molecules.
- 1/4 tsp baking powder: This is your lift. Why this? It creates the fluffy "sponge" texture we want in a mug.
- 1 pinch salt: Don't skip this! Why this? Salt intensifies the chocolate flavor and cuts through the sugar.
- 1/4 cup whole milk: The liquid that brings it all together. Why this? The fat in whole milk adds a velvety mouthfeel that skim milk lacks.
- 2 tbsp neutral oil: I use canola or vegetable oil. Why this? Oil stays liquid at room temperature, making the cake feel moister than butter would.
- 1/2 tsp vanilla extract: The unsung hero of chocolate desserts. Why this? Vanilla rounds out the sharp edges of the cocoa for a professional finish.
- 1 tbsp semi sweet chocolate chips: These create little molten pockets. Why this? They provide a texture contrast against the soft cake crumb.
If you want a dairy-free option, you can easily swap the milk. Oat milk is my favorite substitute because it has a natural creaminess that mimics dairy better than almond milk. If you choose to go the vanilla route for a vanilla mug cake recipe, just swap the cocoa powder for an extra 2 tablespoons of flour and double the vanilla extract.
It’s that simple!
Must Have Tools For Success

You don't need a stand mixer or a fancy kitchen for this, which is half the charm. However, a few specific items will make your life much easier and ensure your quick microwave mug cake for one comes out right every single time.
First, the mug itself is the most important tool. You need a 12 ounce microwave safe ceramic mug. If the mug is too small (like an 8 ounce tea cup), the batter will overflow and create a sticky mess on your microwave glass. If it's too big, the cake might look a bit flat and sad.
Ceramic is better than glass because it holds heat more steadily.
Second, get a small whisk or even just a sturdy fork. The goal is to get into the "corners" of the mug. Mugs are usually cylindrical but have a slight curve at the bottom. Flour loves to hide there. A mini whisk is a joyful little tool that makes sure your batter is perfectly smooth and glossy before it hits the heat.
Precise Steps To Chocolate Bliss
The beauty of this recipe is the timeline. You are exactly 6 minutes away from dessert, and most of that is just waiting for it to cool down enough so you don't burn your tongue. Follow these steps exactly to avoid the dreaded "rubbery mug cake" syndrome.
- Whisk the 1/4 cup flour, 2 tbsp cocoa powder, 2 tbsp sugar, 1/4 tsp baking powder, and pinch of salt directly in your mug. Continue until the mixture is a uniform dusty brown. Note: Breaking up the cocoa clumps now prevents bitter bites later.
- Pour in the 1/4 cup milk, 2 tbsp neutral oil, and 1/2 tsp vanilla extract. Whisk vigorously until the batter is smooth and glossy. Note: Be sure to scrape the very bottom edges where dry flour often gets trapped.
- Drop the 1 tablespoon of semi sweet chocolate chips right into the center of the batter. Do not stir them in. Note: They will naturally sink a bit and create a molten core in the middle of the cake.
- Place the mug in the center of the microwave. Cook on high (1000W) for 60 to 75 seconds. Stop when the center looks slightly tacky and wet. Note: Every microwave is different; start with 60 seconds and add 5 second intervals if it's still liquid.
- Remove the mug carefully it will be hot! Let the cake rest for 2 minutes. Wait for the internal structure to set. Note: This is the most critical step; the residual heat finishes the cooking process gently.
Numeric Checkpoints for Accuracy
- Mug Size: 12 ounces (minimum).
- Microwave Power: 1000 Watts (adjust time up by 15% for 700W-800W models).
- Resting Time: 120 seconds exactly.
Fixing Common Microwave Baking Issues
Even the simplest recipes can go sideways if the microwave is having a bad day. If your cake didn't turn out quite right, don't throw the mug away! It’s usually a very quick fix for the next round.
Why Your Cake Is Rubbery
This is the number one issue with any easy 3 ingredient dessert or mug cake. It usually happens because of overcooking or overmixing. When you whisk too long after adding the liquid, you develop gluten. When you cook too long, you're essentially dehydrating the cake.
| Problem | Root Cause | Solution |
|---|---|---|
| Rubbery/Tough | Overcooked or too much gluten | Reduce time by 10 seconds; mix only until just smooth. |
| Overflowing | Mug too small or too much baking powder | Use a 12oz mug; ensure level measuring spoons. |
| Dry/Crumbly | Not enough fat or liquid | Add an extra teaspoon of milk next time; check oil amount. |
Why Your Cake Is Gooey
If you pull the mug out and it looks like soup, you simply haven't given the molecules enough energy to bond. However, remember that "tacky" is good. If the edges are set but the very middle has a slight sheen, you’ve hit the jackpot.
Common Mistakes Checklist
- ✓ Using a mug with straight sides rather than tapered sides for even cooking.
- ✓ Forgetting to check the wattage of your microwave (mine is 1000W, yours might be 1200W!).
- ✓ Not sifting the cocoa powder with a fork, leading to "cocoa bombs" of bitterness.
- ✓ Eating it immediately and burning your mouth (the 2 minute rest is for safety too!).
- ✓ Using a "healthy mug cake recipe" swap like applesauce without adjusting the cook time.
Creative Variations For Your Mug
Once you have mastered the basic easy chocolate mug cake, the world is your oyster or your chocolate bar. I love to play with different flavor profiles depending on what I have in my baking cabinet.
If you want something a bit more sophisticated, try a "Salted Caramel" version. Simply push a soft caramel candy into the center along with the chocolate chips and sprinkle a tiny bit of flaky sea salt on top after cooking. The caramel melts into a gooey puddle that is absolutely divine.
For a "Nutty Bliss" version, stir in a teaspoon of peanut butter or almond butter before microwaving. Don't mix it in completely; leave it as a swirl for the best texture.
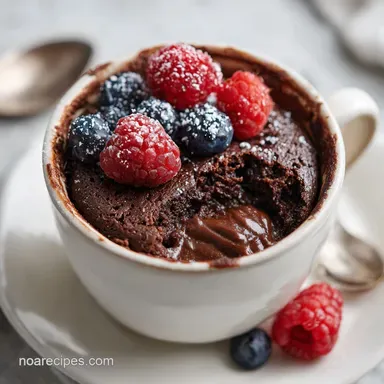
If you are looking for a simple microwave mug cake that feels a bit lighter, you can try adding a handful of frozen raspberries. The tartness of the berries cuts through the richness of the cocoa perfectly.
Just be aware that frozen fruit adds moisture, so you might need an extra 10 seconds in the microwave to make sure it sets. For a cozy autumn vibe, a dash of cinnamon or pumpkin spice in the dry mix goes a long way.
Storing And Reheating Your Treat
Let's be honest: a quick single serve dessert is meant to be eaten right now. However, sometimes life happens, and you might only get halfway through.
Fridge Storage: You can keep the mug in the fridge for up to 24 hours. Just cover the top with a bit of plastic wrap or a silicone lid to keep the air out. Because it's an oil based cake, it won't get as rock hard as a butter based cake would.
Reheating: To bring it back to life, microwave it for only 10 to 15 seconds. Any longer and it will become that rubber ball we talked about earlier. I like to add a tiny splash of milk on top before reheating to create a bit of steam that re moisturizes the crumb.
Zero Waste Tip: If you find the cake has become too dry to enjoy on its own, crumble it up! It makes a fantastic topping for a bowl of vanilla yogurt or a scoop of butterscotch toffee ice cream. You can even mix the crumbs with a little bit of frosting to make a single "cake pop" treat.
Perfect Sides For Your Cake
While this cake is a star on its own, a few simple additions can make it feel like a gourmet experience. Contrast is the name of the game here. You have a warm, soft, sweet cake, so you want something cold, crisp, or acidic to balance it out.
A giant scoop of cold vanilla bean ice cream is the classic choice. As it melts into the warm cake, it creates a sort of "self saucing" pudding effect that is hard to resist. If you want something a bit less heavy, a dollop of unsweetened whipped cream or even a spoonful of Greek yogurt works wonders.
The tanginess of the yogurt is surprisingly good against the deep chocolate.
For a drink pairing, I always go for a cold glass of milk or a sharp espresso. If you're feeling fancy, a few fresh strawberries on the side add a brightness that cleanses the palate between bites.
No matter how you serve it, this quick microwave mug cake for one is proof that you don't need a special occasion to treat yourself to something made from scratch with love. Enjoy every steamy, chocolatey bite!

Recipe FAQs
Why is my microwave mug cake gummy or rubbery?
Overcooking is the primary cause. Microwaves vary in power, so if your 1000W unit is actually stronger, stop the cycle at 60 seconds if the center looks set. Always ensure you let the cake rest for 2 minutes, as this final steam cook stage finishes the texture perfectly.
How to avoid bitter clumps of cocoa powder in my cake?
Whisk the dry ingredients thoroughly before adding liquids. Break up any visible cocoa lumps with your fork until the mixture is a uniform dusty brown color throughout the mug.
Is it true I can substitute the oil with applesauce for a lower calorie count?
No, this is a common misconception. Swapping the oil for other ingredients changes the chemistry of the cake, often leading to a dense or gummy texture that doesn't cook properly within the standard 60-75 second window.
Can I store the cake if I cannot finish the whole serving?
Yes, keep it in the fridge for up to 24 hours. Cover the top of your ceramic mug with plastic wrap or a silicone lid to prevent the cake from drying out while refrigerated.
How to reheat a refrigerated mug cake?
Microwave on high for only 10 to 15 seconds. Avoid heating for longer, or the cake will quickly turn into a rubbery, inedible texture.
Does the shape of the mug affect the cooking time?
Yes, tapered sides are significantly better than straight sides. Tapered mugs promote more even heat circulation, preventing the edges from overcooking before the center sets.
Is it safe to eat the cake the moment it stops spinning in the microwave?
No, the 2-minute rest period is essential. It allows the internal structure to finish setting through residual heat and prevents you from burning your mouth on the extremely hot, molten center.
Quick Chocolate Mug Cake
Ingredients:
Instructions:
Nutrition Facts:
| Calories | 596 calories |
|---|---|
| Protein | 8.3 g |
| Fat | 36.5 g |
| Carbs | 68.3 g |
| Fiber | 4.1 g |
| Sugar | 34.8 g |
| Sodium | 215 mg |
