Simple No Bake Chocolate Cheesecake: Velvety and Rich
- Time:30 minutes active + 6 hours chilling = 6 hours 30 mins total
- Flavor/Texture Hook: Intensely fudgy with a cookie shatter crust
- Perfect for: Stress free dinner parties or summer celebrations
- Master This Simple Nobake Chocolate Cheesecake
- Vital Recipe Timing and Specs
- Why the Filling Stays Firm
- Essential Ingredients for Maximum Flavor
- Kitchen Tools for Better Results
- Creating the Glossy Chocolate Filling
- Solving Common Texture Issues Quickly
- Smart Swaps for Budget Baking
- Debunking Texture and Temperature Myths
- Keeping Your Dessert Fresh Longer
- Perfect Toppings for Visual Appeal
- Recipe FAQs
- 📝 Recipe Card
Master This Simple Nobake Chocolate Cheesecake
The sound of a chocolate sandwich cookie snapping under a rolling pin is one of the most satisfying rhythms in my kitchen. You might have been told that a "real" cheesecake requires the low, slow heat of an oven and the constant anxiety of checking for a wobble that might turn into a crack.
Honestly, forget everything you know about the traditional baked version. You do not need a temperamental oven or a massive pan of hot water to achieve a slice that holds its own on a dessert plate.
I remember the first time I tried a simple nobake chocolate cheesecake and expected it to be airy like a mousse or, worse, rubbery like gelatin heavy puddings. I was so wrong. When you use real melted chocolate instead of just cocoa powder, the result is a rich, truffle like consistency that feels incredibly indulgent.
This isn't a "shortcut" dessert that tastes like a compromise; it’s a deliberate choice to highlight the marriage of tangy cream cheese and dark cacao.
We are going for a texture that is dense enough to stand tall but soft enough to yield to a fork with zero resistance. The secret lies in how we handle the fat and the air. By the time you’re done, you’ll have a glossy, deep brown filling nestled in a salty sweet crust that looks like it came from a high end patisserie.
Trust me, once you see how that semi sweet chocolate sets up into a velvety crumb, you’ll never go back to the baked version for your chocolate fix.
Vital Recipe Timing and Specs
Before we get our hands into the cookie crumbs, let's look at the logistics. This is a game of patience rather than heat. Because we aren't using eggs or flour to bind the filling, we are relying on the physics of cooling fats. The chocolate and the cream cheese need time to bond and firm up at a molecular level.
If you try to slice this after only two or three hours, you will end up with a delicious chocolate soup. It won't be pretty. You need the full duration to ensure the structure is sound. If you find yourself in a genuine emergency and need a chocolate hit in under ten minutes, you are better off whipping up a chocolate mug cake recipe instead of rushing this masterpiece.
Preparation Precision Points
To get that professional finish, keep these three checkpoints in mind. First, your cream cheese must be exactly room temperature not cold, not melted, but soft enough that a finger leaves an effortless indentation.
Second, your heavy cream needs to be straight from the fridge cold to hold the air we’re about to beat into it. Finally, the melted chocolate needs to be about 90°F (32°C) when it hits the cheese; it should feel barely warm to the touch, ensuring it incorporates without melting the air bubbles you just created.
Why the Filling Stays Firm
Understanding the "why" behind this simple nobake chocolate cheesecake makes you a more confident cook. We aren't just mixing things together; we are creating a stable structure without heat.
- Cacao Butter Set: Using semi sweet chocolate with at least 60% cacao provides natural cacao butter, which firms up at room temperature to give the cake its "sliceable" structure.
- Fat Emulsification: The Philadelphia cream cheese acts as a stabilizer, holding the liquid cream and melted chocolate in a tight suspension that doesn't leak or weep.
- Aerated Support: Beating the heavy cream to stiff peaks creates a scaffold of tiny air bubbles that prevents the dense chocolate from feeling like a heavy block of fudge.
- Sugar Hydration: Powdered sugar contains a tiny amount of cornstarch, which helps absorb excess moisture from the cream cheese, contributing to a matte, professional finish.
| Method | Total Time | Texture | Best For |
|---|---|---|---|
| No Bake (This Recipe) | 6 hours 30 mins | Silky, truffle like, dense | Summer, beginners, prep ahead |
| Baked Chocolate | 8 hours+ | Custard like, airy, porous | Traditionalists, winter holidays |
| Shortcut (Gelatin based) | 3 hours | Springy, jelly like, light | High volume catering, humid days |
This table shows why the no bake method is often superior for chocolate lovers. The lack of eggs allows the cacao flavor to remain bright and unmasked, while the texture stays closer to a Ganache than a custard.
Component Deep Dive
| Ingredient | Science Role | Pro Secret |
|---|---|---|
| Cream Cheese | Structural base | Use full fat only; low-fat has too much water and will collapse. |
| Heavy Cream | Volume and lightness | Chill your bowl and whisk for 10 mins before whipping for more volume. |
| 60% Chocolate | Setting agent | Don't go above 70% or the filling will become too brittle and crack. |
| Cookie Crumbs | Moisture barrier | Press them hard with the bottom of a glass to prevent a soggy base. |
Essential Ingredients for Maximum Flavor
To make this simple nobake chocolate cheesecake truly sing, the quality of your ingredients matters more than your technique. Since we aren't cooking out any "raw" flavors, every note will be front and center.
- 300g chocolate sandwich cookies: These provide the dark, slightly bitter crunch that balances the sweet filling.
- 70g unsalted butter: Melted. Why this? It acts as the glue that turns crumbs into a solid, snappy crust.
- 0.25 tsp sea salt: Why this? A tiny bit of salt in the crust amplifies the chocolate's complexity.
- 500g Philadelphia cream cheese: Must be full fat. Why this? The fat content is what ensures the cake sets without needing gelatin.
- 120g powdered sugar: Sifted to avoid lumps.
- 300g semi sweet chocolate (60% cacao): Chopped finely. Why this? This is our primary setting agent; use high-quality bars, not chips.
- 300ml heavy whipping cream: Chilled.
- 1 tsp vanilla extract: Why this? Vanilla acts as a "flavor bridge" between the dairy and the cacao.
- 2 tbsp unsweetened cocoa powder: Why this? It deepens the color and adds a hit of dry tannins to cut the richness.
For the crust, if you want to experiment with different textures, the balance of salt here reminds me of the sweet and salty ratio in my chewy chocolate chip cookies.
| Original Ingredient | Substitute | Why It Works |
|---|---|---|
| Semi sweet Chocolate | Milk Chocolate | Sweeter/softer. Note: Reduce sugar by 20g to compensate. |
| Sandwich Cookies | Graham Crackers | Adds a honey/toasty note; less intense than chocolate. |
| Vanilla Extract | Espresso Powder (1 tsp) | Coffee mimics the depth of vanilla but highlights roasted notes. |
Kitchen Tools for Better Results
You don't need a professional pastry kitchen, but a few specific items will make your life significantly easier. A 9 inch springform pan is non negotiable here. Because the filling is so creamy, trying to lift it out of a regular cake tin will result in a disaster.
You’ll also want a stand mixer or a reliable hand mixer. While you can whip the cream by hand, your forearms will regret it, and you likely won't achieve the stiff peaks required for a stable structure.
An offset spatula is my "chef's secret" for getting that perfectly flat, mirror like top that looks so satisfying when you unclip the pan.
Creating the Glossy Chocolate Filling
- Pulse the cookies. Grind the chocolate sandwich cookies in a food processor until they are fine crumbs.
- Bind the crust. Mix the crumbs with melted butter and sea salt until it looks like wet sand.
- Shape the base. Press the mixture into the 9 inch springform pan, going 1 inch up the sides. Note: Using a flat bottomed measuring cup helps get a tight, even pack.
- Chill the foundation. Freeze the crust for 15 minutes to lock the butter in place.
- Melt the chocolate. Use a double boiler or microwave in 30 second bursts, stirring until glossy.
- Whip the cream. Beat the chilled heavy cream until stiff peaks form. It should stand straight up when you lift the whisk.
- Cream the cheese. Beat the room temperature cream cheese and powdered sugar until smooth and free of any tiny white lumps.
- Add the dark notes. Sift in the cocoa powder and vanilla, mixing until the color is uniform.
- Emulsify the chocolate. Slowly pour the slightly cooled chocolate into the cheese mixture while mixing on low. Watch for the mixture to become shiny.
- Fold gently. Incorporate the whipped cream in three batches using a spatula. Stop as soon as no white streaks remain to keep the air inside.
- Smooth and set. Pour into the crust, level the top, and refrigerate for at least 6 hours.
Solving Common Texture Issues Quickly
Even the best of us run into trouble sometimes. The most common heartbreak with a no bake cake is the "slump" when you remove the springform ring and the sides start to bulge. Usually, this is because the chocolate wasn't folded in correctly or the chilling time was cut short.
Why Your Cheesecake is Lumpy
If you see little beads of white cream cheese in your chocolate filling, it’s because the cheese was too cold when you started. The cold cheese "shocks" the melted chocolate, causing it to solidify into tiny grains instantly. To fix this next time, ensure your cheese is genuinely room temperature.
If it's already happened, you can try gently warming the bowl over a pot of steaming water for 10 seconds and whisking vigorously, but prevention is much better.
| Problem | Root Cause | Solution |
|---|---|---|
| Filling is runny | Whipped cream was too soft | Fold in 1/4 cup more whipped cream (stiff peaks) or chill 4 hours longer. |
| Crust crumbles | Not enough butter or pressure | Press the crumbs harder next time; ensure butter is fully incorporated. |
| Top is cracked | Fridge is too cold/dry | Cover the pan tightly with plastic wrap to maintain moisture while setting. |
Common Mistakes Checklist
- ✓ Using "spreadable" cream cheese from a tub (it has too much air/water).
- ✓ Adding the chocolate while it's still piping hot (it will deflate the whipped cream).
- ✓ Skipping the sifting of the powdered sugar (lumps are impossible to beat out later).
- ✓ Rushing the 6 hour chill time (the center needs that time to reach a uniform temp).
- ✓ Forgetting to wipe the knife between slices (for those clean, professional edges).
Smart Swaps for Budget Baking
If you are looking to save a few dollars, you can swap the high end chocolate bars for a good quality store brand chocolate chips, though the texture might be slightly grainier due to stabilizers in the chips.
You can also use generic "chocolate cream cookies" instead of the name brand ones; they usually perform exactly the same in a crust.
For a larger crowd, you can double this recipe, but I recommend using two 9 inch pans rather than one giant one. A massive cheesecake has a harder time setting in the center and might remain soft. If you halve the recipe, use a 6 inch springform pan and reduce the chilling time to about 4 hours.
Debunking Texture and Temperature Myths
One major myth is that "no bake means no structure." People think you need gelatin to make a cheesecake stand up without eggs. As we’ve seen, the high fat content of the cream and the setting properties of cacao butter are more than enough. Another myth is that you can't over mix a no bake filling.
You actually can over work the heavy cream, turning it into butter, which will give your cheesecake a greasy mouthfeel. Stop mixing the moment everything is combined!
Keeping Your Dessert Fresh Longer
Proper storage is the difference between a great dessert and a soggy one. This simple nobake chocolate cheesecake keeps beautifully in the fridge for up to 5 days, provided it's kept in an airtight container or tightly wrapped.
The crust will eventually lose its snap as it absorbs moisture from the filling, so it's best eaten within the first 72 hours.
Freezing: You can freeze this cake! Wrap the entire set cheesecake (or individual slices) in a double layer of plastic wrap and then foil. It will last for 2 months. To serve, thaw it in the fridge overnight. Do not thaw at room temperature, or the condensation will make the crust mushy.
Zero Waste: If you have leftover cookie crumbs, save them in a jar to sprinkle over vanilla ice cream. If you have a bit of filling left that didn't fit in the pan, spoon it into small ramekins for "cheesecake mousse" snacks.
Perfect Toppings for Visual Appeal
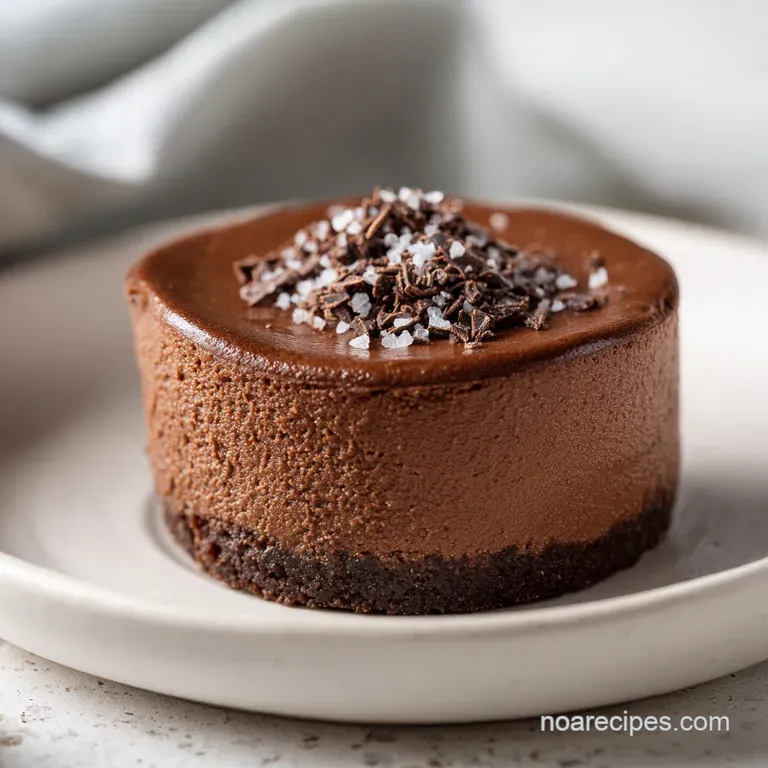
The final presentation is where you can really have some fun. A simple nobake chocolate cheesecake is a dark canvas. I love doing a light dusting of extra cocoa powder right before serving to give it a matte, moody look.
Chef's Tip: If you want those perfect, "food blogger" slices, dip your sharpest knife in hot water and wipe it dry between every single cut. The heat from the metal will glide through the cold chocolate filling like a hot wire through butter, giving you sharp, clean edges every time.
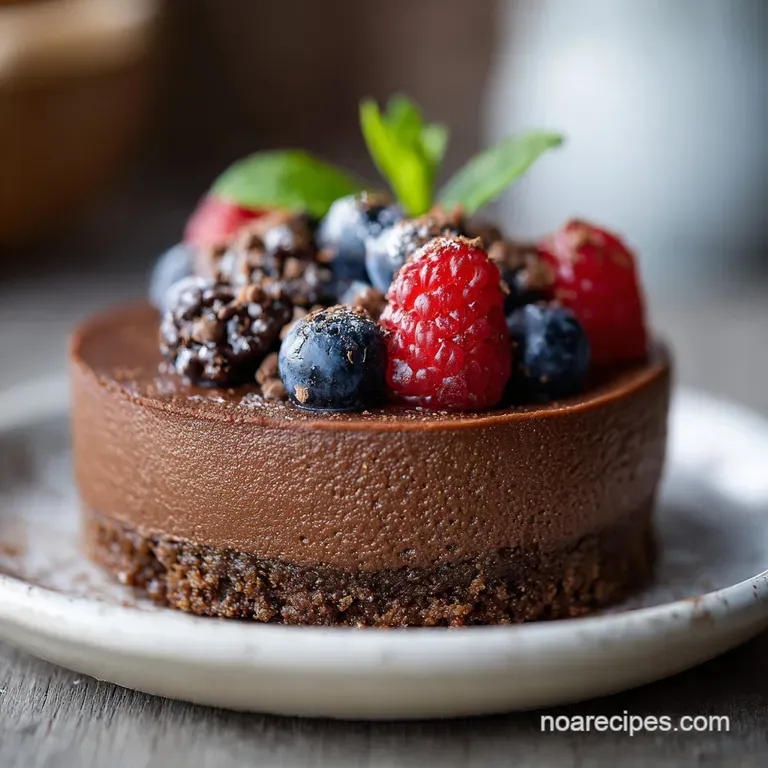
For a bit of contrast, serve each slice with a dollop of unsweetened whipped cream and a few raspberries. The tartness of the berries cuts through the heavy fat of the cheesecake, making the whole experience feel lighter.
If you're feeling extra indulgent, a drizzle of salted caramel or a handful of shaved white chocolate curls adds a professional touch that belies how simple this was to put together.

Recipe FAQs
What are the ingredients in 3 ingredient cheesecake?
This is a common misconception. A proper no-bake chocolate cheesecake requires all the listed components, including cream cheese, powdered sugar, semi sweet chocolate, heavy whipping cream, vanilla extract, cocoa powder, chocolate sandwich cookies, butter, and sea salt to achieve the correct structure
and flavor.
How to make a basic cheesecake no bake?
Combine chocolate sandwich cookie crumbs, melted butter, and sea salt to form the base, pressing it into a 9 inch springform pan before freezing for 15 minutes. Beat room temperature cream cheese with sifted powdered sugar, cocoa powder, and vanilla, then incorporate melted semi sweet chocolate and folded-in whipped cream before chilling for at least 6 hours.
How do you make a no bake chocolate cheesecake?
Melt the chopped semi sweet chocolate carefully and let it cool until it is pourable but no longer hot. Fold it into a mixture of room temperature cream cheese, sugar, cocoa, and vanilla, then gently incorporate stiff peaked heavy whipping cream before setting the entire mixture in the refrigerator for at least 6 hours.
What are common no-bake cheesecake mistakes?
The most frequent error is using spreadable cream cheese from a tub, which contains too much moisture to set properly. Other common pitfalls include adding hot chocolate to the batter, failing to sift the powdered sugar, or rushing the required 6-hour chill time.
Can I speed up the chilling process?
No, you must allow the full 6 hours. Rushing the chill time prevents the center from reaching the uniform temperature necessary to set the structure, which will result in a messy, unstable slice.
Is it true I can use hot melted chocolate to combine with the cream cheese?
False. Adding piping hot chocolate will deflate the air bubbles in your whipped cream, resulting in a dense, flat texture instead of a light, aerated mousse.
How to get clean slices when serving?
Wipe your knife with a clean, damp cloth between every single slice. This prevents the chocolate and cream mixture from dragging across the cake and ensures your presentation looks professional and clean.
Simple No Bake Chocolate Cheesecake

Ingredients:
Instructions:
Nutrition Facts:
| Calories | 567 kcal |
|---|---|
| Protein | 5.7 g |
| Fat | 40.6 g |
| Carbs | 45.5 g |
| Fiber | 2.5 g |
| Sugar | 32.4 g |
| Sodium | 310 mg |
