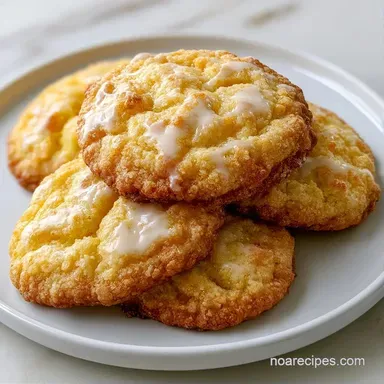
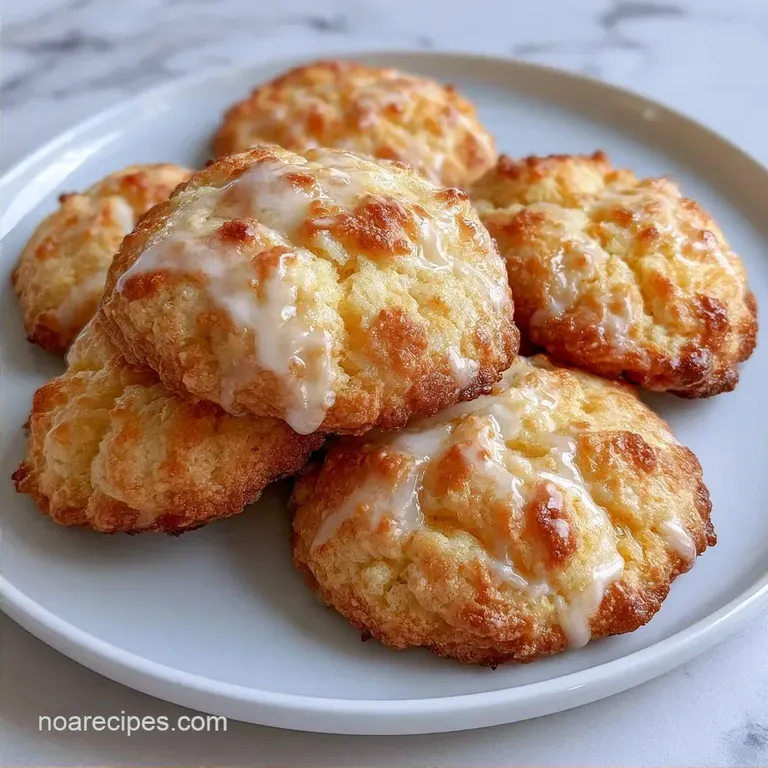
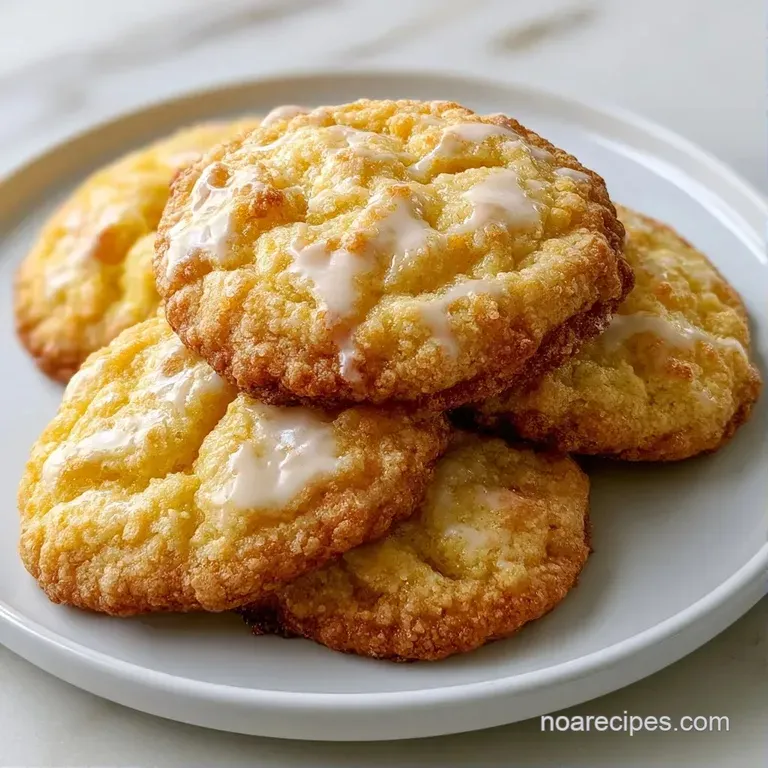
Glazed Lemon Cookies: Tangy and Tender
- Time: 15 min active + 12 min bake + 15 min glaze set
- Flavor/Texture Hook: Tangy lemon brightness with a soft, tender crumb
- Perfect for: Afternoon tea, bake sales, or a sunny weekend treat
- Glazed Lemon Cookies Made From Scratch
- What Makes These Treats Work
- Gathering Your Baking Essentials
- Tools You Actually Need
- Bringing the Cookies Together
- Avoiding Common Kitchen Disasters
- Making These Cookies Your Own
- Freezing and Reheating Guide
- Perfect Complements for Citrus
- Baking Truths
- Storage and Zero Waste
- Recipe FAQs
- 📝 Recipe Card
Glazed Lemon Cookies Made From Scratch
The scent of fresh lemon zest hitting creamed butter always takes me back to the old school bake sales I used to visit as a kid. There was always that one platter of bright, white topped cookies that looked like little clouds.
They weren't fancy, but they had that punchy, nostalgic citrus flavor that tasted like a summer afternoon.
I used to think you needed a professional bakery to get that specific texture, but it's actually just about the timing. These Glazed Lemon Cookies are meant to be soft and tender, almost like a cross between a traditional sugar cookie and a miniature cake.
If you've ever struggled with cookies that taste more like soap than fruit, this is the fix. We use a combination of zest in the dough and fresh juice in the glaze to get a layered flavor. It's straightforward, joyful, and doesn't require any weird equipment.
What Makes These Treats Work
- Room Temp Egg: Using an egg at room temperature keeps the emulsion stable. If it's cold, the butter can seize up and create a lumpy batter.
- Low Speed Mixing: Mixing the flour on low stops the gluten from overdeveloping. This ensures the cookies stay tender instead of becoming tough or bread like.
- The Matte Top: Pulling the cookies out when the tops are matte prevents them from drying out. This leaves the center soft while the edges set.
| Feature | Fresh Ingredients | Shortcut Version | Impact |
|---|---|---|---|
| Lemon Flavor | Fresh zest and juice | Bottled lemon juice | Fresh is brighter; bottled can taste metallic |
| Butter | Softened unsalted | Melted butter | Softened gives more lift; melted makes them denser |
| Glaze | Freshly whisked | store-bought frosting | Fresh glaze is thinner and more tart |
Gathering Your Baking Essentials
The heart of these Glazed Lemon Cookies is the citrus. I always recommend buying organic lemons if you can, since we're using the zest. You want those bright yellow oils from the skin to do the heavy lifting here.
For the base, all purpose flour provides the structure we need. I've tried almond flour, but it makes the cookie too fragile for the dipping process. Stick to the basics for that classic, nostalgic chew.
| Ingredient | What It Does | Best Swap |
|---|---|---|
| Unsalted Butter | Adds richness and tenderness | Salted butter (omit 1/4 tsp salt) |
| Baking Soda | Creates a slight rise and browning | Baking powder (use 1.5 tsp) |
| Powdered Sugar | Creates the opaque, firm glaze | Icing sugar (same thing) |
| Lemon Zest | Provides the concentrated citrus oil | Lemon extract (1 tsp, but less punch) |
Tools You Actually Need
You don't need a kitchen full of gadgets for this. A standard bowl and a hand mixer or stand mixer (like a KitchenAid) will do the job. I prefer a whisk for the glaze because it breaks up the lumps of powdered sugar faster than a fork.
Parchment paper is a non negotiable here. These cookies have a high sugar content, and if they stick to the pan, you'll lose that clean, rounded edge. A wire rack is also a must for the cooling phase so the bottoms don't get soggy.
Bringing the Cookies Together
Phase 1: Prepping the Base
- Beat the softened butter and granulated sugar until the mixture looks pale and fluffy. Note: This incorporates air for a lighter cookie.
- Mix in the lemon zest and vanilla extract until smooth.
- Add the egg and beat on medium speed until the batter is glossy and fully combined.
Phase 2: The Perfect Bake
- Sift in the flour, baking soda, and salt. Mix on low speed until the white streaks of flour just disappear. Note: Stop immediately to avoid toughness.
- Roll the dough into 1 inch balls (about 1 tbsp each).
- Place the balls 2 inches apart on parchment lined baking sheets.
- Bake at 350°F (175°C) for 10-12 minutes until the edges are barely set and the tops are matte.
- Allow cookies to cool on the sheet for 5 minutes before moving them.
Phase 3: The Finishing Glaze
- Whisk together powdered sugar and lemon juice until the texture is velvety. Add a teaspoon of milk or water if it's too thick to dip.
- Dip the tops of the cooled cookies into the glaze or drizzle it over with a spoon.
- Let the cookies sit on a wire rack for 15 minutes until the glaze forms a firm, opaque shell.
Chef's Tip: To get a perfectly smooth top, dip the cookie straight down into the glaze and give it a tiny swirl before lifting. If the glaze starts to thicken while you're dipping, add a drop of water to loosen it back up.
Avoiding Common Kitchen Disasters
The most frustrating thing is when your cookies turn into flat pancakes. This usually happens because the butter was too warm or the oven wasn't fully preheated. If your kitchen is hot, pop the rolled dough balls in the fridge for 10 minutes before baking to firm them up.
Another common issue is a glaze that slides right off the cookie. This happens if the cookies are still too hot. The heat melts the sugar in the glaze, making it runny and transparent instead of thick and white.
Why Your Cookies Spread Too Much
If the cookies flatten out, it's usually a temperature issue with the fat or the oven.
| Problem | Root Cause | Solution |
|---|---|---|
| Flat, thin cookies | Butter was melted, not softened | Chill dough 15 mins before baking |
| Uneven browning | Oven hot spots | Rotate pan halfway through |
| Glaze is transparent | Cookies were too hot | Cool completely on a rack |
Why the Flavor is Off
If you taste baking soda, you probably didn't sift your dry ingredients. Soda can clump, and if a clump lands in one cookie, it creates a bitter metallic taste. Always whisk or sift your flour and soda together first.
Making These Cookies Your Own
These Glazed Lemon Cookies are a great canvas for other flavors. If you want a more concentrated citrus punch, replace one tablespoon of the granulated sugar with an extra tablespoon of lemon zest. It makes the flavor much more aggressive and tart.
For a twist, try an Italian Lemon Cookie style by adding a pinch of almond extract to the dough. The almond and lemon combination is a classic for a reason, and it adds a sophisticated depth to the sweetness.
If you're looking for a "lemon berry" burst, press a single fresh raspberry into the top of the dough ball right before baking. Once glazed, the red berry pops against the white sugar.
For those needing a dairy-free version, coconut oil (solidified) works as a replacement for butter. According to King Arthur Baking, using vegan butter substitutes can work, but keep an eye on the spread as some brands melt faster than dairy butter.
If you find yourself craving something savory after all this sugar, you might want to balance the day with a hearty dinner. My Classic Meatloaf recipe is a great way to bring things back to earth after a baking session.
Freezing and Reheating Guide
You can freeze the baked, unglazed cookies for up to 3 months. Store them in an airtight container with parchment paper between layers so they don't stick. When you're ready to eat them, let them thaw at room temperature for an hour, then apply the fresh glaze.
I don't recommend freezing the glazed versions, as the moisture in the glaze can cause the cookies to become spongy. If you must freeze them glazed, keep them in a very tight seal to prevent freezer burn.
To reheat, a quick 5 second zap in the microwave makes them taste like they just came out of the oven. Just don't overdo it, or the glaze will melt into a sticky puddle.
Perfect Complements for Citrus
These cookies pair beautifully with a sharp Earl Grey tea or a cold glass of iced hibiscus tea. The tannins in the tea cut through the sugar of the glaze, making the lemon flavor stand out more.
If you're hosting a larger spread, these work well alongside fresh berries or a light fruit salad. For those who prefer a savory contrast to their sweets, a side of salty nuts or a sharp cheddar cheese platter creates a great balance of flavors.
If you're planning a full menu and need a main course that matches the "glazed" theme, you could try a Tangy Glazed Beef Meatloaf. It provides that same hit of acidity and sweetness but in a savory, filling format.
Baking Truths
Some people think that you must use a stand mixer to get these cookies right. That's not true. A sturdy whisk and some elbow grease can cream butter and sugar just as well, though it takes a few more minutes.
Another misconception is that you should "cream" the butter and sugar for ten minutes. Over creaming can actually incorporate too much air, which might cause the cookies to rise and then collapse, leaving you with a wrinkled top. Three to five minutes is plenty.
Finally, don't believe the idea that you need to use "cake flour" for a soft cookie. All purpose flour, when handled gently and not overmixed, provides the perfect balance of structure and tenderness for these Glazed Lemon Cookies.
Storage and Zero Waste
Store your finished cookies in a single layer in an airtight container. They'll stay fresh at room temperature for about 3 days. If you live in a very humid area, keep them in the fridge to prevent the glaze from becoming tacky.
To avoid waste, don't throw away your leftover lemon peels. After zesting, squeeze every drop of juice out of the fruit. You can simmer the leftover peels with a bit of sugar and water to make a simple lemon syrup for cocktails or pancakes.
If you have leftover glaze, keep it in a small jar in the fridge for 48 hours. It's great for drizzling over pound cake or dipping fresh strawberries. Just whisk in a tiny drop of milk to bring it back to a pourable consistency.
Recipe FAQs
How to make the glaze for these cookies?
Whisk powdered sugar and lemon juice until velvety. Add a teaspoon of milk or water if the mixture needs to be thinner for drizzling.
Is it true that I should beat the flour into the dough until it is perfectly smooth?
No, this is a common misconception. Mix on low speed just until the white streaks of flour disappear to avoid overworking the gluten and making the cookies tough.
How to store the cookies to keep the glaze from getting sticky?
Place them in a single layer in an airtight container. If you live in a humid climate, store the container in the fridge to keep the glaze shell firm.
How to bake the lemon cookies for the best texture?
Bake at 350°F (175°C) for 10 12 minutes. Pull them from the oven when the edges are barely set and the tops look matte.
Why do my cookies spread too much on the baking sheet?
Ensure your butter is softened, not melted. Overly warm butter causes the dough to collapse during baking. If you enjoyed mastering temperature control here, see how the same principle works in our sheet pan meatloaf.
Can I use bottled lemon juice instead of fresh?
No, stick with fresh lemon juice. Bottled versions lack the bright, aromatic acidity needed to balance the sweetness of the powdered sugar.
How to prevent the glaze from soaking into the cookie?
Allow cookies to cool on the sheet for 5 minutes. Dip or drizzle the glaze only after they have cooled to ensure the icing sets into an opaque shell.
Glazed Lemon Cookies